Giraffe Neck Top (Tutorial, Kinda)
Hi guys!
So today we have some more self-drafting fun with a turtleneck cowl top I made about a week ago.
Basically, I really love cowl neck tops, and wanted to see if I could make something that had the cowl drape effect, but without the plunging neckline. Which is definitely nothing against plunging necklines - most of what I make probably falls into that category (*coughs* LBD, RAF dress, purple velvet...) - but I've decided I need more stylish-yet-practical items in my wardrobe, and risking accidentally baring all every time you lean over doesn't really scream "practical".
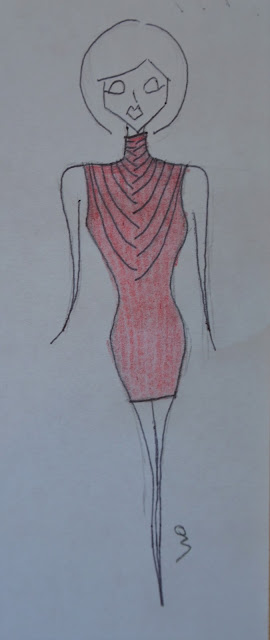
I became quite transfixed with the idea of making a turtleneck cowl like my sketch below, but it took me a while to work out how I was actually going to make it.
In the end, it wasn't actually that complicated, but then again, it did take me 3 pattern drafting attempts to find this out...
And now, forgive my terrible photos and explanations, because it's tutorial time!
And now, forgive my terrible photos and explanations, because it's tutorial time!
Firstly, I took my stretch top block, and widened it by about 1cm, as mine is really intended for more tight-fitting items. Then I added in the turtleneck - I wanted mine to be 4" long, or 5" total with the hem, so I drew up from the centre front line, and at the 5" mark, drew a horizontal line 90 degrees to this, in the direction of the rest of the bodice. Then I drew straight up from the point where the shoulder and neck lines meet, until this line hit the new horizontal line. And this was the turtleneck complete.
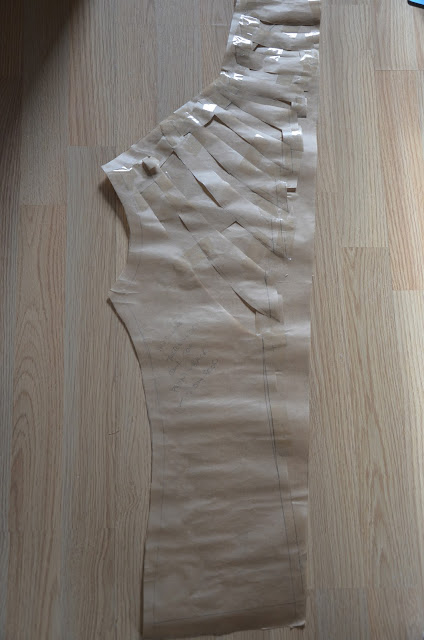
This photo is laughably bad, be hopefully you can at least see the basic shape of it. Next up was drawing lines for the drape - you can probably tell I didn't measure these out evenly, I just drew some vaguely downwards-inclining curves on the neck and shoulder seam until I was happy with the look.
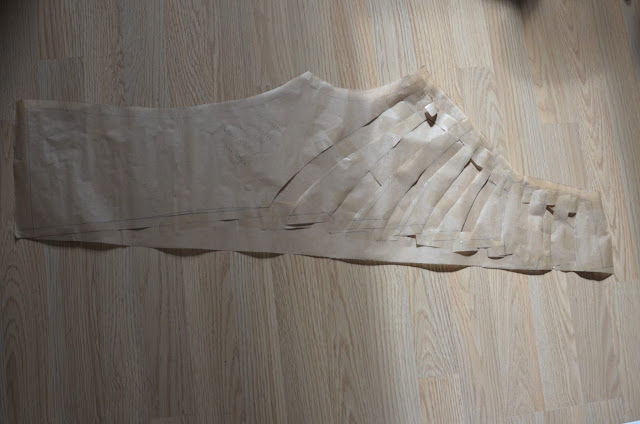
Now what I found out through a fair amount of trial and error, was that standard slash-and-spread cowl drape wouldn't work with this neckline, rather it would have to be pleated at the neck and shoulder seams to give this effect. So, as you can see in my next terrible photo, I cut along each of these lines and spread them out 1.5" at both the shoulder/neck line, and the centre front line.
Maybe it's just me, but it really reminded me of a giraffe...
This was by far the most time-consuming part of the pattern drafting process. Next up, I drew a line from the CF bottom hem point to the CF top neckline point. I then added in seam allowances and filled in all the empty spaces with scrap paper, and that was my pattern complete.
I decided on the same design for the front and back of the top, so now it was time to cut out and sew up, which was a pretty straightforward process. It only took a couple of hours to sew - the most complicated bit was sorting out all the pleats and making sure the shoulder and neck seams were all the same lengths as their counterparts.
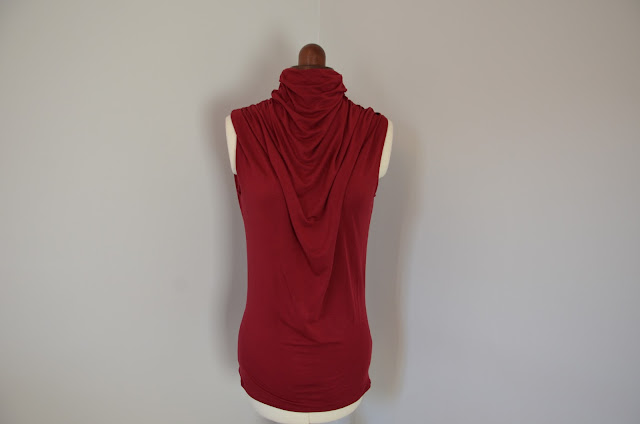
And that's basically it! Here's some sexy mannequin shots - actual photo shoot to follow...at some point.
Front:
Back:


That the good article it's helped me & other people. Thanks for sharing your valuable information.
ReplyDeleteAt this time Online Shopping is the best choice for all family members & you. So you can order an online product & get your offer.