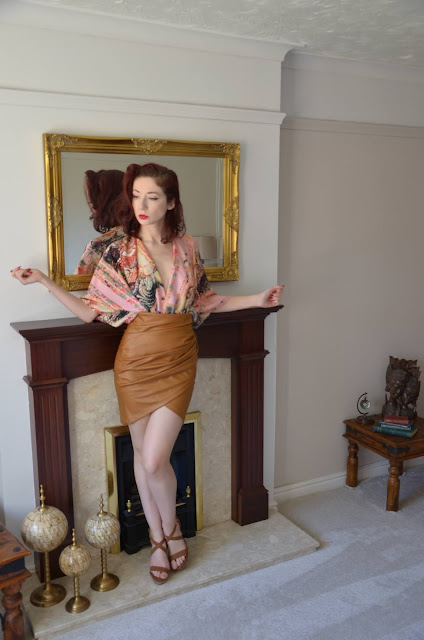
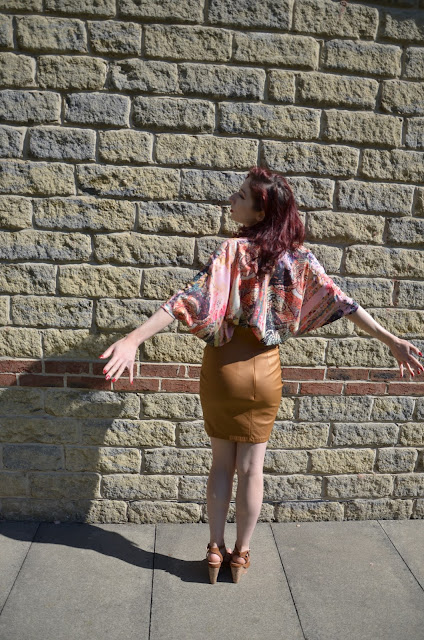
Mosaic Print Batwing Wrap Top (Tutorial)

This post may contain affiliate links – this means I may receive a commission if you decide to make a purchase through links on this post, at no additional cost to you. Affiliate links will be marked with an asterisk (*).

Open front wrap batwing kimono style sleeve blouse top tutorial self drafted sewing pattern fabric remnant stash busting DIY fashion what to make with 1m fabric

We've got some more stash busting for you today, in the form of this mosaic panel print georgette fabric, of which I only had 1m. I bought this, I'd assume, about three or four years ago, but have had absolutely no idea what to do with it, so have just left it in my ever-increasing pile hoping that one day inspiration would hit me. Several times in the last few years, I've taken it out and draped it on my mannequin, trying to work out what the hell I could do with it, but I've had nothing. Being a panel print - a pattern repeated in clearly defined sections, all directional - limits design choices, and the fabric itself is very slinky and lightweight, which also narrows down what it could be used for.


But this time, inspiration finally hit me and I draped what you see below - an open front blouse with all-in-one batwing style sleeves. Normally once I've come up with a design, there's a reasonably lengthy process of either drafting my own pattern, or trying to find a commercial pattern that will work, but this wasn't going to need any of that - this is literally just rectangles. I actually took photos of the process, so I thought I'd walk you through exactly how I made this. That's right, I'm writing a tutorial.

What to make with 1m of fabric or less fabric remnant stash busting self drafted sewing pattern DIY fashion hacks

This project was pretty light on the materials and only used 1m of fabric (which was 1.4m wide) and matching thread. No closures or bindings or any of that stuff, and it only took me an afternoon to make, so it's perfect for a little stash busting or a beginner's project.

Do bear in mind though, you may need more/less fabric than this depending on your size (for reference, I am roughly a UK size 10).

STEP 1:
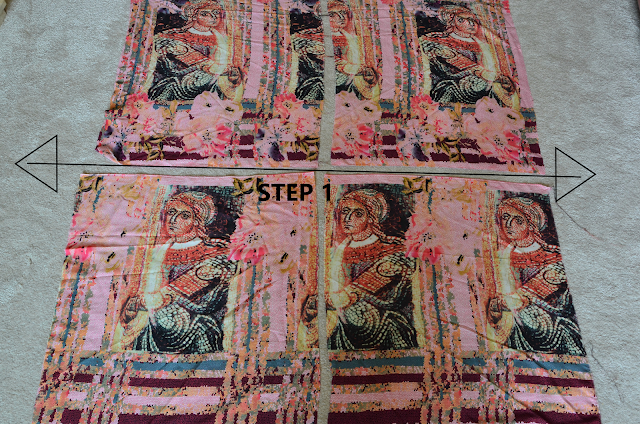
The first thing I did was cut the 1m x 140cm fabric down the middle to get myself two rectangles each measuring roughly 1m x 70cm (i.e. we're cutting in half the longest measurement of the original rectangle). As I was working with a panel print, the key here was to make sure everything was lying in the same place - as you can see, there are a lot of stripes on this, and we want them all to match up. This resulted in me having to cut some of the fabric away, so make sure you taking pattern matching into consideration before you start cutting!

Step 1 of DIY batwing wrap top tutorial, What to make with 1m of fabric or less fabric remnant stash busting self drafted sewing pattern DIY fashion hacks

STEP 2:
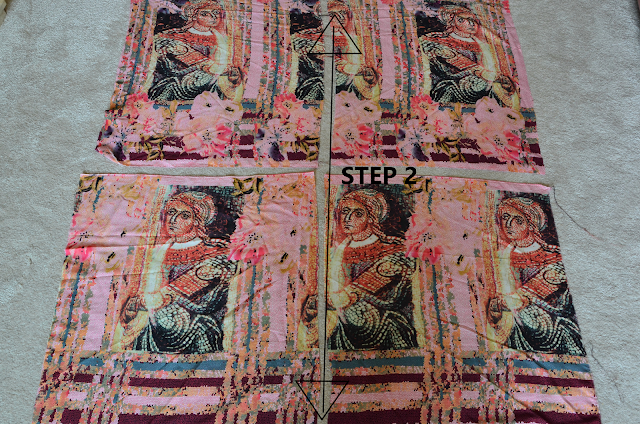
As you can see from the photo, the top three panels of the print were all facing left, while the bottom three panels were all facing right. I wanted the sections at the back to be roughly mirror images of each other, and I wanted the same for the front, which meant I now needed to separate the panels vertically. Again, these were just split in two down the middle, meaning I now had 4 rectangles, all measuring the same, at about 50cm x 70cm (see photo below).

Step 2 of DIY batwing wrap top tutorial, What to make with 1m of fabric or less fabric remnant stash busting self drafted sewing pattern DIY fashion hacks

STEP 3:
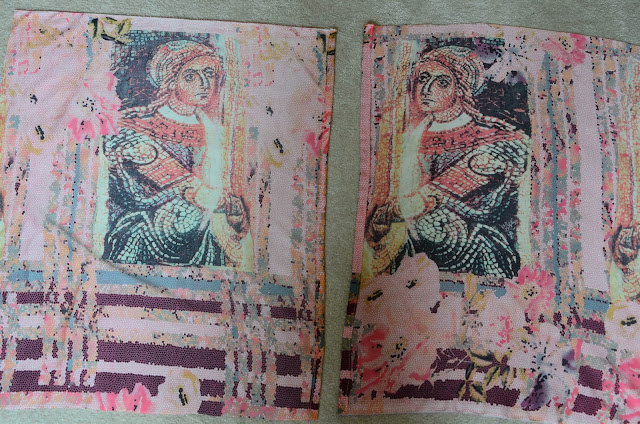
Then I seamed together one right-facing person to one left-facing person so that they were facing away from each other, as below, using French seams and a 5/8" (1.5cm) seam allowance. This forms the centre back seam.


This centre back seam is purely here so that my mosaic pieces can face the way I think looks best - if you're making this at home and don't need to fiddle with your print positioning, there is no functional need for this seam, so you can leave it out. If you're doing this, during step 2, you want to leave the top rectangle as-is and use this as your back piece, but still cut your bottom rectangle in two, as you will still need this for your centre front opening. In other words, if you don't need a centre back seam, you'll want three rectangles, one measuring roughly 1m x 70cm (back panel), and two measuring 50cm x 70cm (front panels).

Step 3 of DIY batwing wrap top tutorial, What to make with 1m of fabric or less fabric remnant stash busting self drafted sewing pattern DIY fashion hacks

STEP 4:
Next, it's time to hem the front neckline. I made a narrow hem of about 5/8" (1.5cm) on each both centre fronts and machine stitched this down.

Step 4 of DIY batwing wrap top tutorial, What to make with 1m of fabric or less fabric remnant stash busting self drafted sewing pattern DIY fashion hacks

STEP 5:
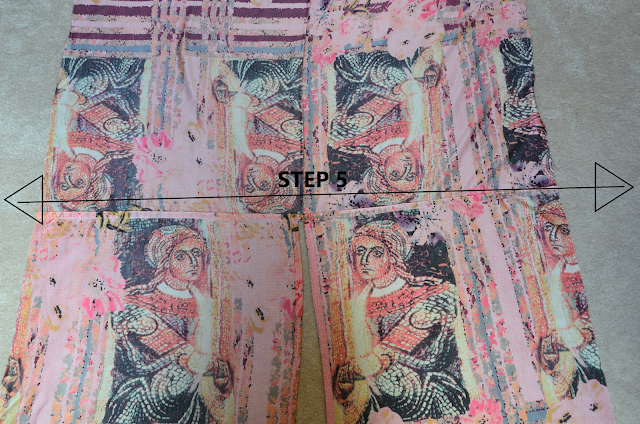
Now the centre fronts are hemmed, we can attach the two front panels to the back. Seam together at the shoulder/sleeve seams (i.e. the tops of each panel) using a 5/8" (1.5cm) seam allowance - I'm using French seams, but feel free to use any other method you prefer.

There will be a slight gap between the two front panels now (since this fabric has been taken in during the hemming process) - so make sure the two fronts are an equal distance either side of the centre back seam to ensure everything is sitting right. If you have no centre back seam, just measure the central point and use this as your guide.

Step 5 of DIY batwing wrap top tutorial, What to make with 1m of fabric or less fabric remnant stash busting self drafted sewing pattern DIY fashion hacks

STEP 6:
Sew up the side seams, leaving space for your armholes (in photo below, marked with the dashes). I stopped my side seam stitching 4" (10cm) away from the shoulder seam, leaving me an 8" (20cm) armhole - obviously, feel free to increase/decrease this to suit your needs. I used a 5/8" (1.5cm) seam allowance again, but this time used an ordinary seam rather than a French seam (French seams will make hemming the armhole complicated). Make sure you really go to town with your backstitching at the armhole, otherwise this seam may start to unravel over time.

Step 6 of DIY batwing wrap top tutorial, What to make with 1m of fabric or less fabric remnant stash busting self drafted sewing pattern DIY fashion hacks

STEP 7:
All that's left now is a load of hemming. I hemmed the armholes by 5/8" (1.5cm) - i.e. the same as my seam allowance. Since my side seams were still left raw (all other seams have been French seamed) I felled them to give a nice, neat finish.
I then hemmed the bottom of the garment with a 1" (2.5cm) hem. And voila, the top is complete!

Open front wrap batwing kimono style sleeve blouse top tutorial self drafted sewing pattern fabric remnant stash busting DIY fashion what to make with 1m fabric

I apologise if none of that made sense and if the photos are dark and weird and don't really help much - but hey, this was my first attempt at a tutorial, so hopefully things will improve with a bit of practice. If you are wanting to make this and are totally lost on what to do, feel free to ask, I'm always happy to help!

Open front wrap batwing kimono style sleeve blouse top tutorial self drafted sewing pattern fabric remnant stash busting DIY fashion

Now onto the part of blogging I'm used to - excessive photos and rambling on about stuff!

Open front wrap batwing kimono style sleeve blouse top tutorial self drafted sewing pattern fabric remnant stash busting DIY fashion

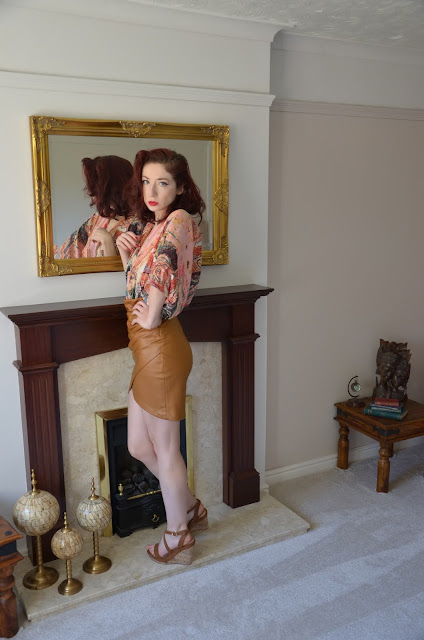
Firstly, as it's likely the most relevant for those actually wanting to make this: things I'd change. If I were to make it again, I'd likely add some more shaping to the side seam, especially when going into the armhole area, to give a little bit more distinction between "sleeve" and "side". As is, moving my arms up too suddenly moves the rest of the top, which can be quite precarious when it has no closures, and stays in place purely by being tucked in right. So if moving my arms messes with this, that's not technically ideal.

Open front wrap batwing kimono style sleeve blouse top tutorial self drafted sewing pattern fabric remnant stash busting DIY fashion

Leading on from that, another change would be to make a belt, either as a separate entity that ties over the top, or attached to the bottom of the garment to turn it more into a wrap top type concept. Either way, the effect is the same: it would add an extra layer of security, and help make sure everything stays where it's meant to. I have plenty of belts that I could wear with this, but one made out of the same material is always the best option if you're like me and like things to be matchy-matchy all the time.

Open front wrap batwing kimono style sleeve blouse top tutorial self drafted sewing pattern what to do with fabric remnants stash busting DIY fashion

Though, since I'm not leaving the house these days, and don't expect to be doing so in the foreseeable future, the risk from the top not staying where it's meant to - the "fallout" if you will - isn't as much of an issue for me as it would be if I was planning on wearing this out and about. I think wearing with a random belt should be good enough to keep the front neckline in place for now at any rate.

Open front wrap batwing kimono style sleeve blouse top tutorial self drafted sewing pattern what to do with fabric remnants stash busting DIY fashion

Now that's out the way, it's time for the positives about this project. Firstly, this was super quick to do. I never cease to be amazed at sewing projects that only take a few hours from start to finish - I think this took me about 3 hours from draping the fabric on the mannequin to giving it the final press. And it was SO easy to make - even though I was making it up as I went along, there was never a moment when I had to think hard about anything, and is there any greater joy in life than that?

Open front wrap batwing kimono style sleeve blouse top tutorial self drafted sewing pattern what to do with fabric remnants stash busting DIY fashion

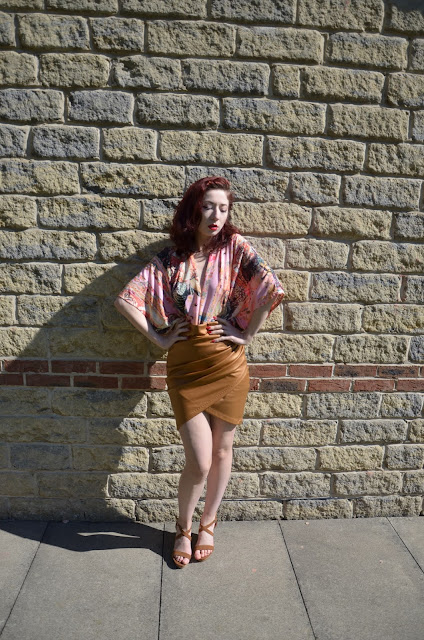
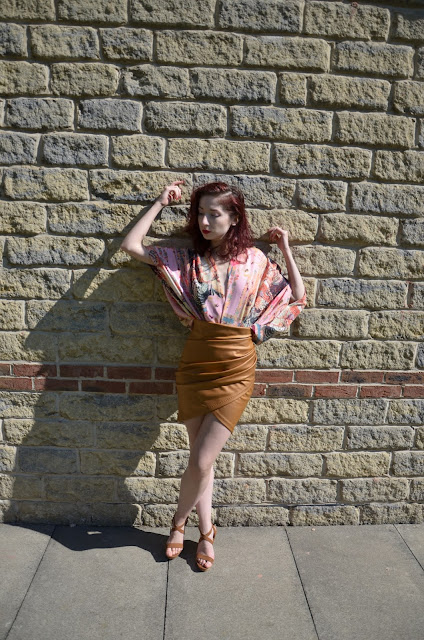
I also really love the shape of this top - it's so soft and drapey and it has one of my favourite design features ever: big sleeves. But because they stop around the elbow, they don't get in the way when trying to do stuff, which really is the dream. One of the reasons I don't wear more bell/kimono/flare sleeves is because I'm terrified of getting food all over them when I'm cooking (or worse, setting fire to them on the hob) and a short-sleeved version is definitely one way of getting round that issue.

Open front wrap batwing kimono style sleeve blouse top tutorial self drafted sewing pattern what to do with fabric remnants stash busting DIY fashion

(Demonstrating how safe this is to wear near a hob. Worn with my faux leather faux wrap skirt)

Open front wrap batwing kimono style sleeve blouse top tutorial self drafted sewing pattern what to do with fabric remnants stash busting DIY fashion

In my attempts not to be a fabric hoarder, I'm no longer buying fabric unless I have a firm plan of what I want to make with it, which has certainly cut down the rate my fabric stash was increasing, if not my fabric stash itself. I'm pretty pleased with this minor victory, but the downside is projects like this, where I'm free to play around and go wherever the mood takes me, ending up with something I never would have planned to make otherwise. 

Open front wrap batwing kimono style sleeve blouse top tutorial self drafted sewing pattern what to do with fabric remnants stash busting DIY fashion

It's kind of making me regret not buying all those random prints I've fallen in love with but knew I had no use for. It turns out I had a use for them after all. Which of course means my self-restraint is going to be pushed even further next time I happen across an online fabric store, but that's what being a sewist is all about, right?

Open front wrap batwing kimono style sleeve blouse top tutorial self drafted sewing pattern what to do with fabric remnants stash busting DIY fashion

Anyway, I don't think I have anything else to say about this project, so thanks for reading and let me know if you decide to give it a go!

Comments

Popular Posts